Archive and upload the build
Like Xcode signing, this is Xcode work. If Eluvio is uploading builds on your behalf, skip to TestFlight and start there once they confirm a build is uploaded.
Note that a Developer-role user can upload builds but cannot submit to the App Store, so the final submission still comes back to you either way.
An archive is the signed, release-configuration build that gets uploaded to App Store Connect. This assumes signing is already working and the app runs on a real device.
Archive the app
-
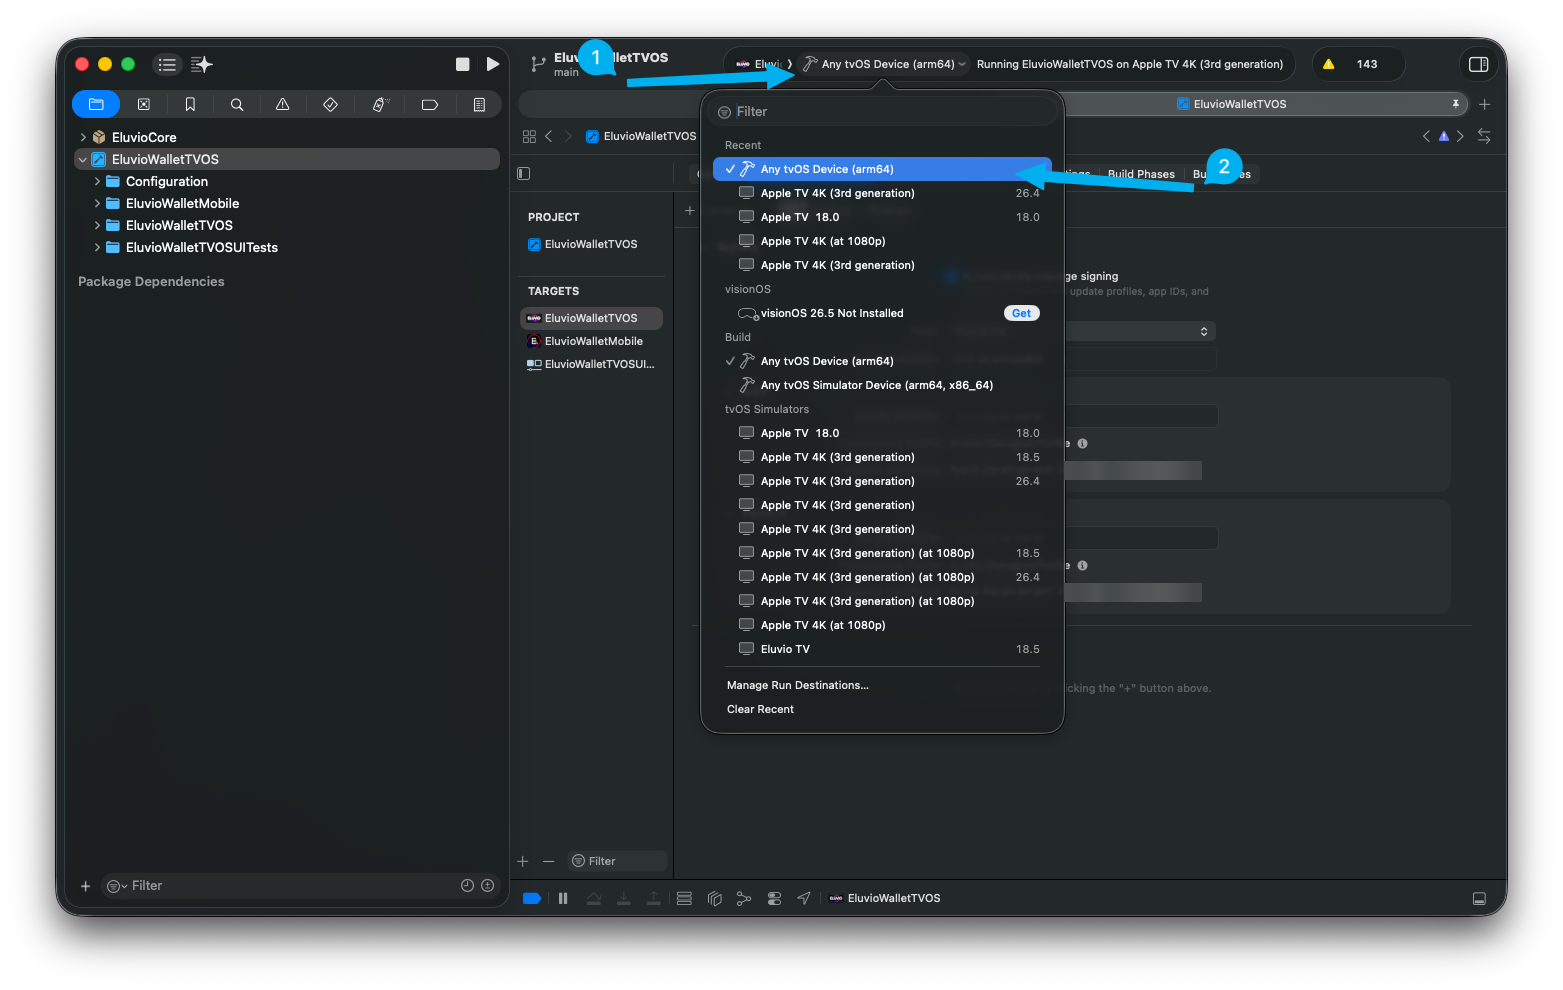
Open the run destination menu in the toolbar (1) and choose Any tvOS Device (arm64) under Build (2) — not one of the tvOS Simulators below it. You cannot archive with a simulator selected; the Archive menu item stays greyed out.
-
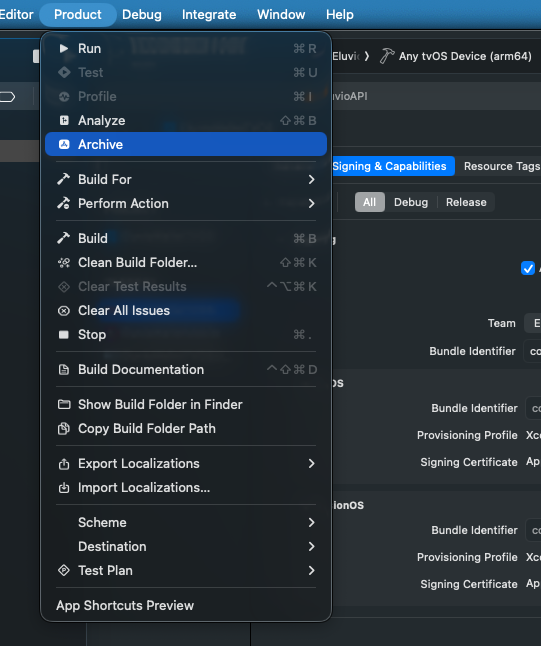
Choose Product → Archive.
-
Wait. A clean archive of this project takes several minutes; it compiles all dependencies in Release configuration.
The scheme is already configured to archive with the Release configuration, so there is nothing to change here.
When it finishes, the Organizer window opens with your new archive selected. If it doesn't appear, open it with Window → Organizer.
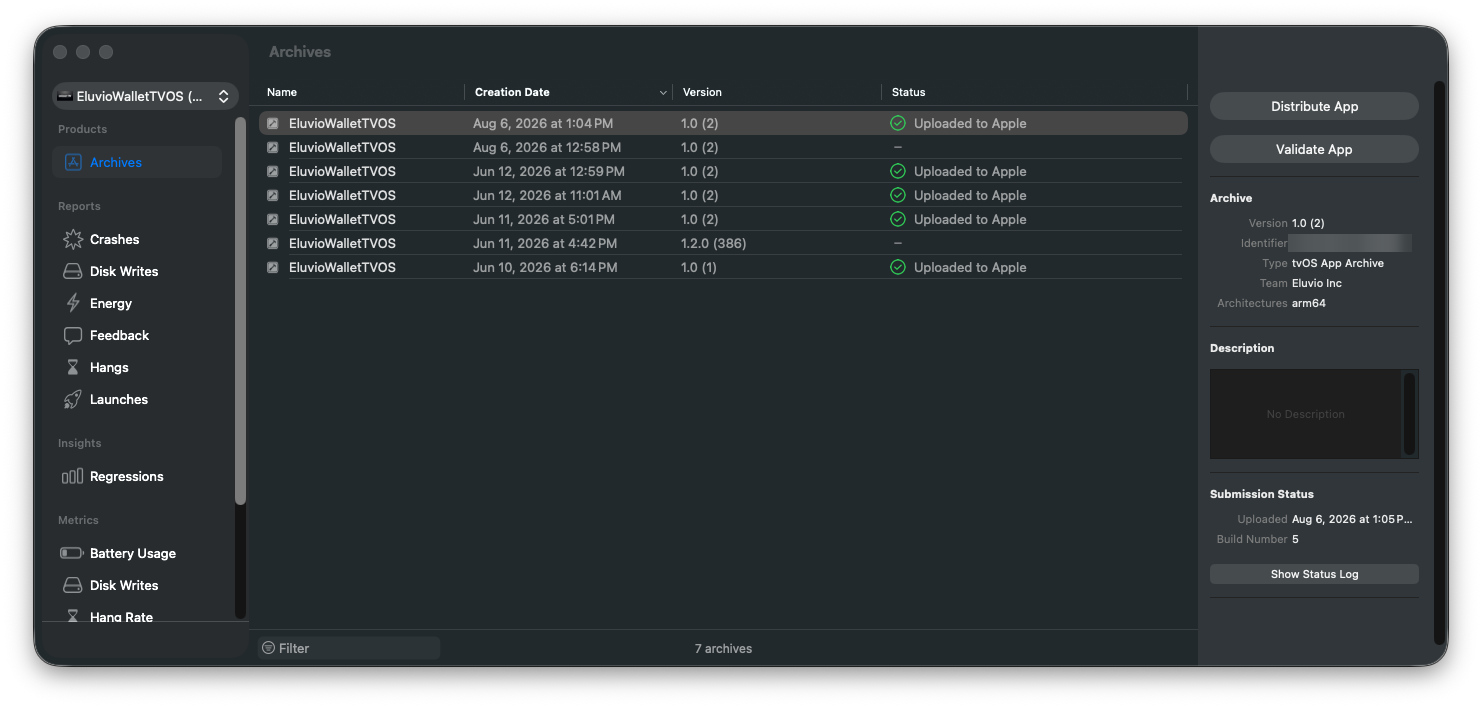
Confirm the version, build number, and bundle identifier shown in the Organizer match what you set on the General tab before continuing.
Upload to App Store Connect
-
With your archive selected in the Organizer, click Distribute App (1).
-
Choose App Store Connect (2), then click Distribute (3). That method uses recommended settings to upload for both testing and release, so there is nothing to configure.
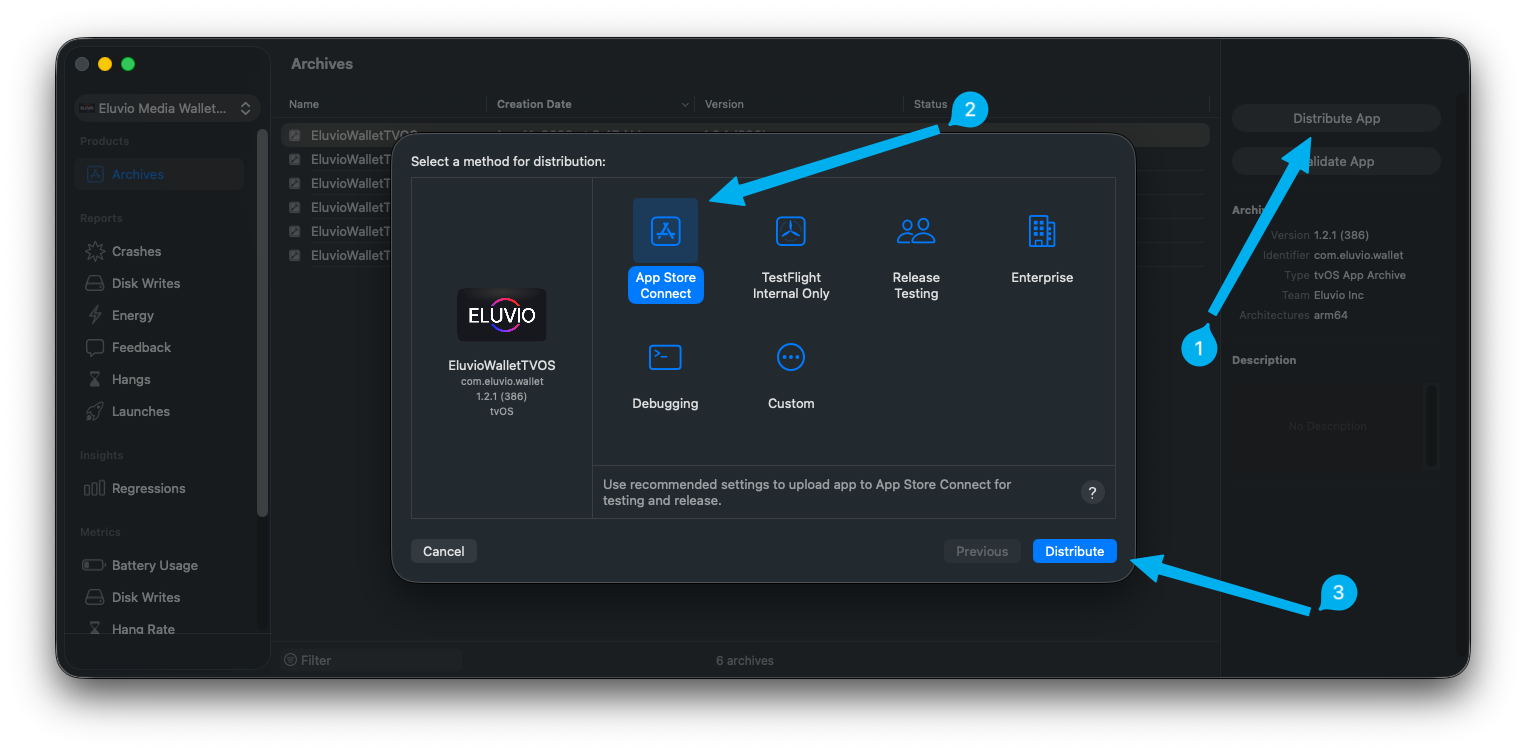
The other methods are for cases this guide does not cover: TestFlight Internal Only skips App Store review but cannot be released, Release Testing and Enterprise are for distribution outside the App Store, Debugging produces a build for local install, and Custom is where you would go to set signing or export an
.ipaby hand.
Xcode signs the build, uploads it, and reports when it is done. This takes a few minutes.
There is nothing to choose along the way: the distribution certificate and provisioning
profile are created for you, and your app's own symbols are uploaded so crash reports are
readable later. If you ever do need control over any of that — or an .ipa on disk to
upload by another route — it lives behind Custom on the method sheet.
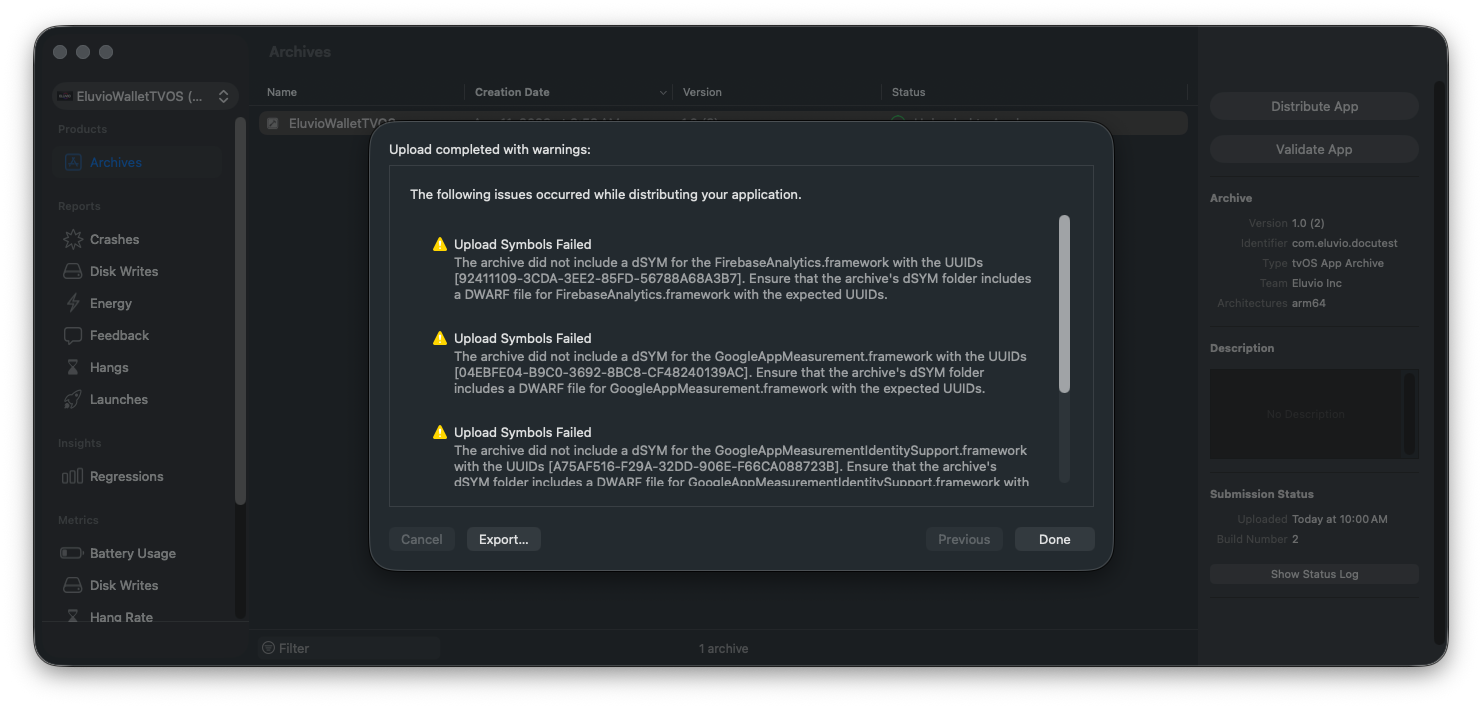
Upload completed with warnings still means the upload worked. The build is on its way to App Store Connect. Click Done.
The warnings are a run of Upload Symbols Failed entries naming FirebaseAnalytics,
GoogleAppMeasurement, and similar Google frameworks. Those ship as prebuilt binaries
without debug symbols, so there is nothing for Xcode to upload for them.
Warnings are not the same as an emailed rejection. If Apple finds a real problem with the binary you will hear about it by email within minutes, and that is covered below.
This project already declares ITSAppUsesNonExemptEncryption = false in its Info.plist,
so you will not be asked encryption questions on every upload. That declaration is correct
for the app as shipped — the app uses only standard HTTPS and platform DRM. If you add
your own cryptography, revisit it.
Confirm the build arrived
-
Go to App Store Connect → Apps → your app → TestFlight.
-
The build appears with status Processing. This takes anywhere from 15 minutes to a few hours.
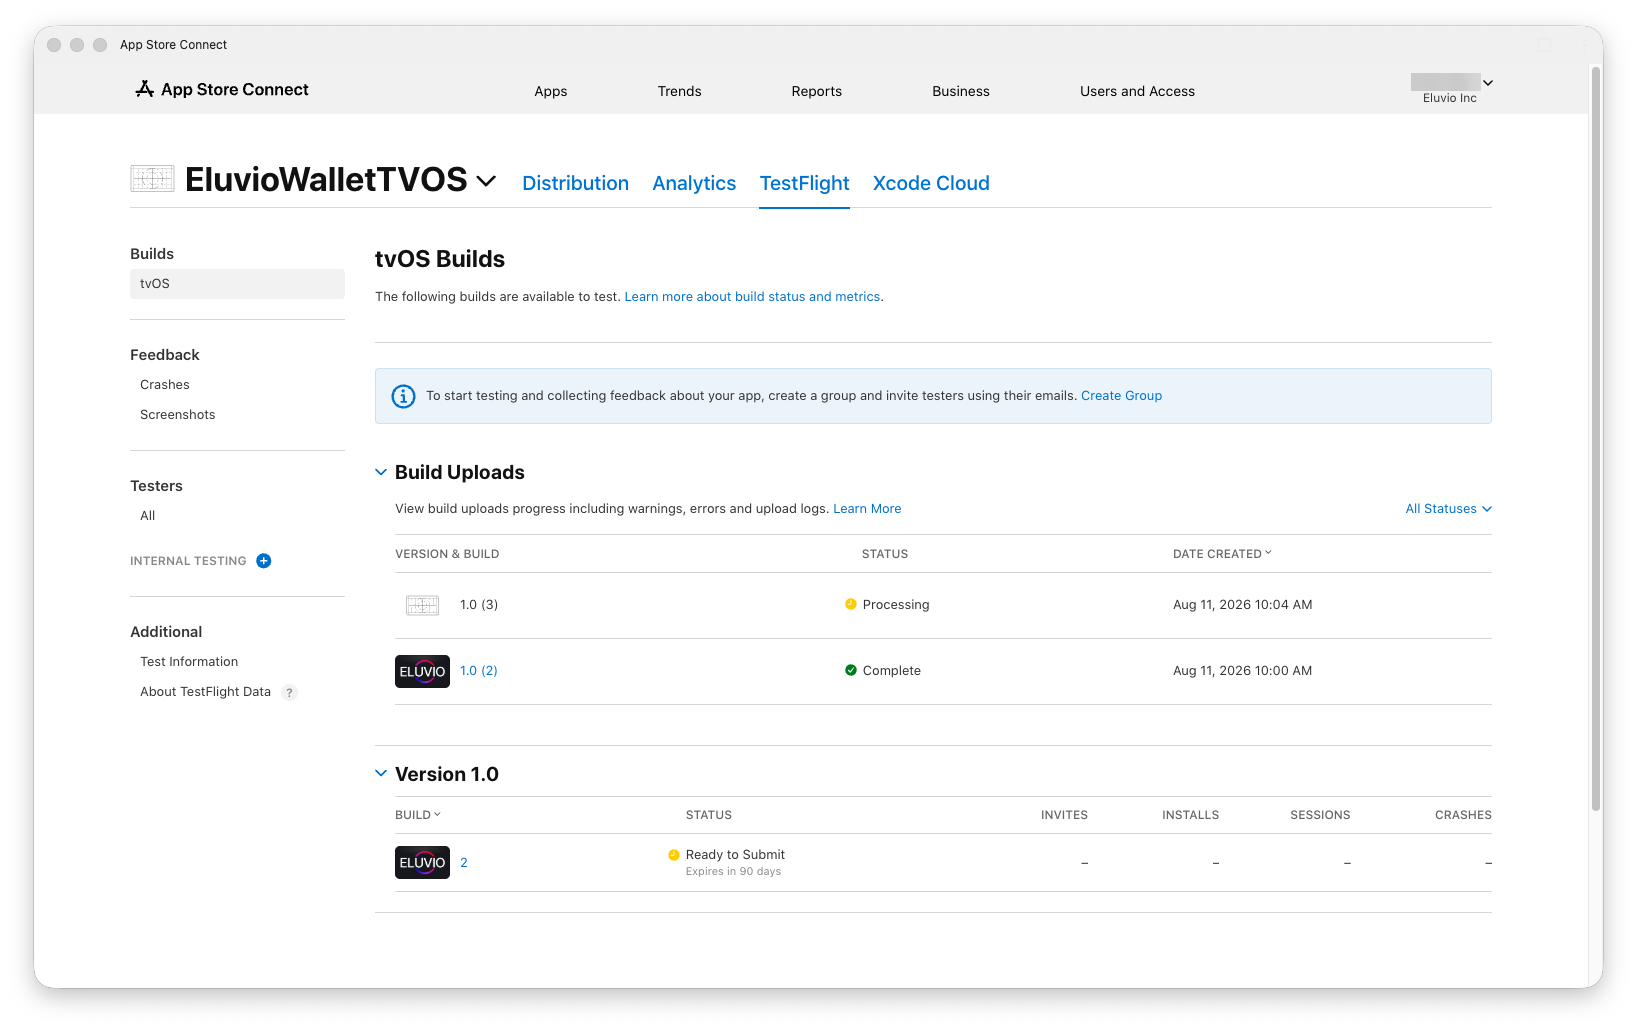
Watch the shared inbox. If something is wrong with the binary, Apple emails you within minutes — before App Review ever sees it. Common causes: an invalid icon, a missing required asset, or a disallowed API.
Next
Once processing finishes, test the build via TestFlight before submitting it.
Upload or archive failing? See Troubleshooting.