Configure Xcode signing
This page and archive and upload are pure Xcode work. If Eluvio is building and uploading on your behalf, skip both and pick the process back up at TestFlight, once they tell you a build has been uploaded.
For them to do that, you must already have given them Developer access and registered the app in your own account.
The step that switches the app from Eluvio's Apple Developer team to yours. Everything here happens on a Mac in Xcode.
Before starting, confirm you have the bundle identifier you registered and the Team ID you recorded.
Fork and clone
-
Fork the app repo to your organization's GitHub account (how to fork).
-
Clone your fork locally (how to clone).
Fork rather than clone directly so you can pull upstream fixes from Eluvio later while keeping your customizations in your own history.
Open the workspace
Open the workspace at the repository root:
EluvioWalletTVOS.xcworkspace
Open the .xcworkspace, not the .xcodeproj. The workspace includes the local
EluvioCore Swift package the app depends on; opening the bare project will fail to
resolve it.
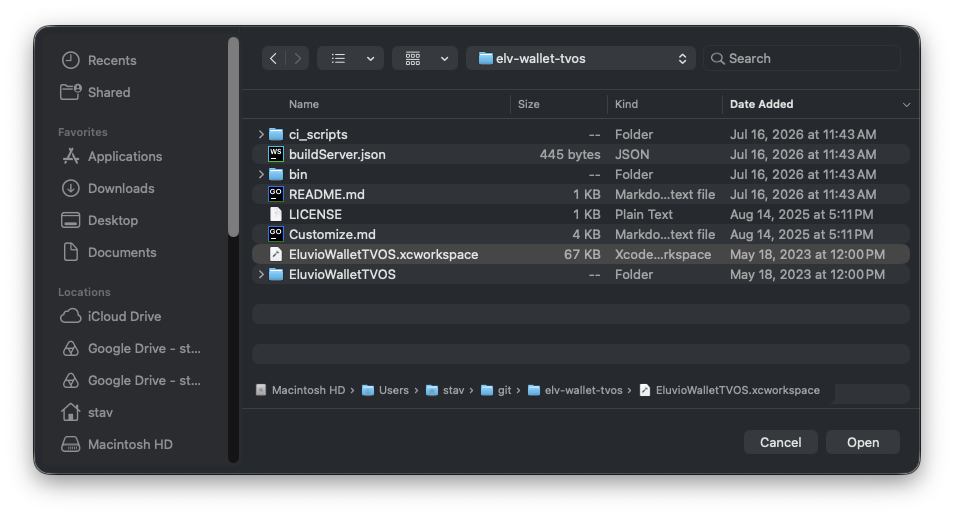
Xcode will start resolving Swift package dependencies on first open. This takes several minutes and needs network access. If you see missing-package errors, use File → Packages → Resolve Package Versions.
Add your Apple Account to Xcode
-
Xcode → Settings (or
⌘,) → Apple Accounts. -
Click Add Apple Account… and sign in with the Apple Account that was invited to your team.
-
Your organization appears under Teams, with the role you were granted beside it — Admin, App Manager, Developer, and so on. That is the confirmation you need: this Mac can now sign as your team.
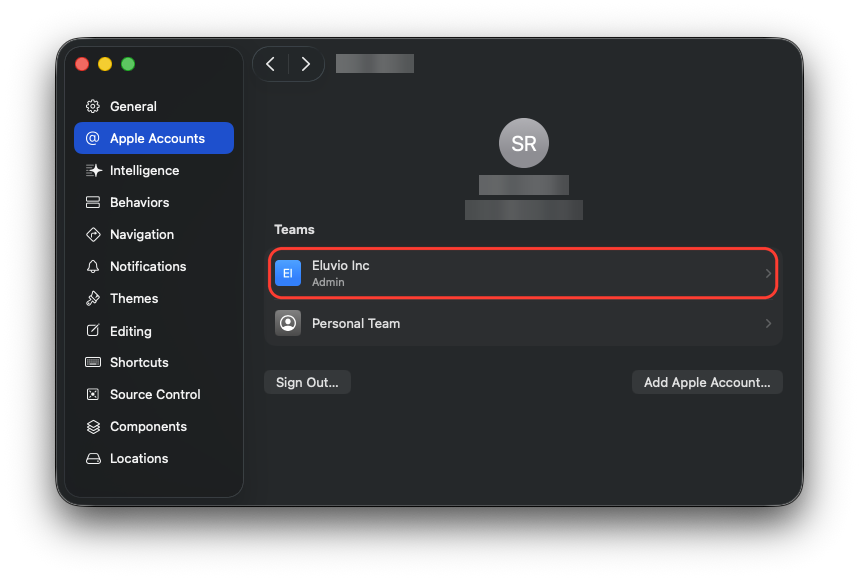
Xcode lists a Personal Team alongside your organization. It is the free provisioning team attached to any Apple Account, it exists whether or not you have a membership, and it cannot sign anything for the App Store. Selecting it here or in Signing & Capabilities produces a build you cannot distribute. Always pick the entry with your company's name.
If your team does not appear: the invitation is unaccepted, two-factor is not enabled, or you signed in with the wrong Apple Account. Signing out and back in forces a refresh.
Set the bundle identifier and team
-
In the Project Navigator, click the blue EluvioWalletTVOS project icon (1).
-
Under TARGETS, select EluvioWalletTVOS (2) — the target, not the entry above it under PROJECT.
-
Open the General tab (3) and set the fields under Identity (4):
- Display Name — what appears under the icon on the Apple TV home screen
- Bundle Identifier — the identifier you registered, replacing
com.eluvio.wallet - Version — your public version, e.g.
1.0 - Build — an integer, e.g.
1
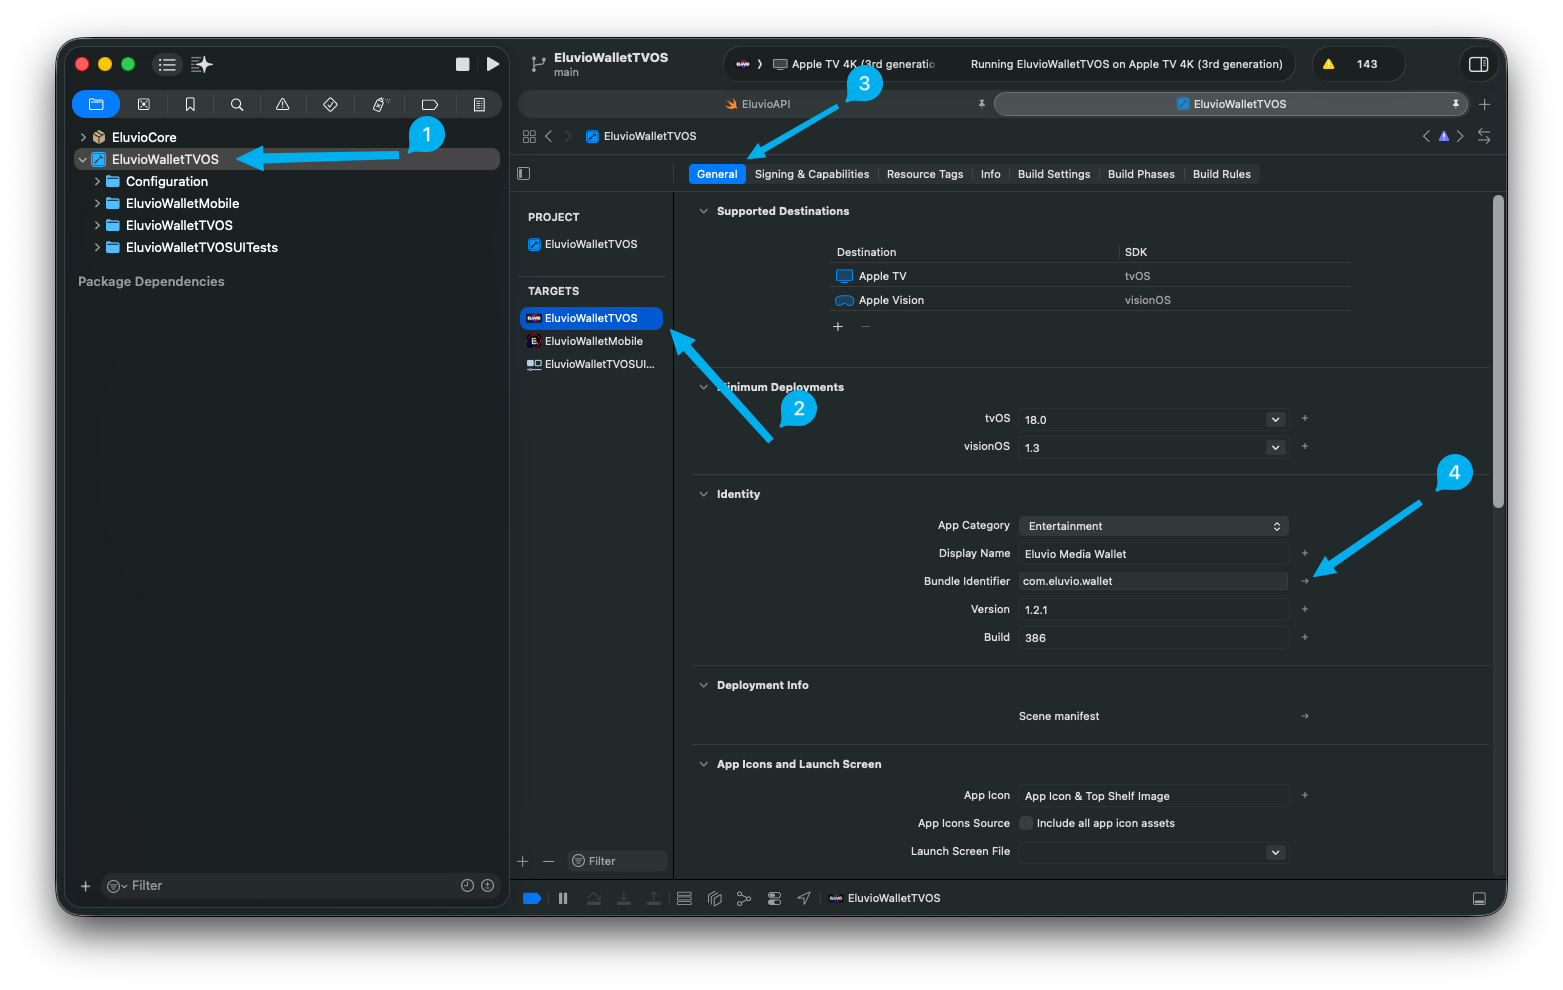
The screenshot shows these fields as the app ships, so it is what you will see before changing anything. All four values in Identity are yours to replace.
-
Switch to the Signing & Capabilities tab, tick Automatically manage signing (1), then pick your organization in the Team dropdown (2).
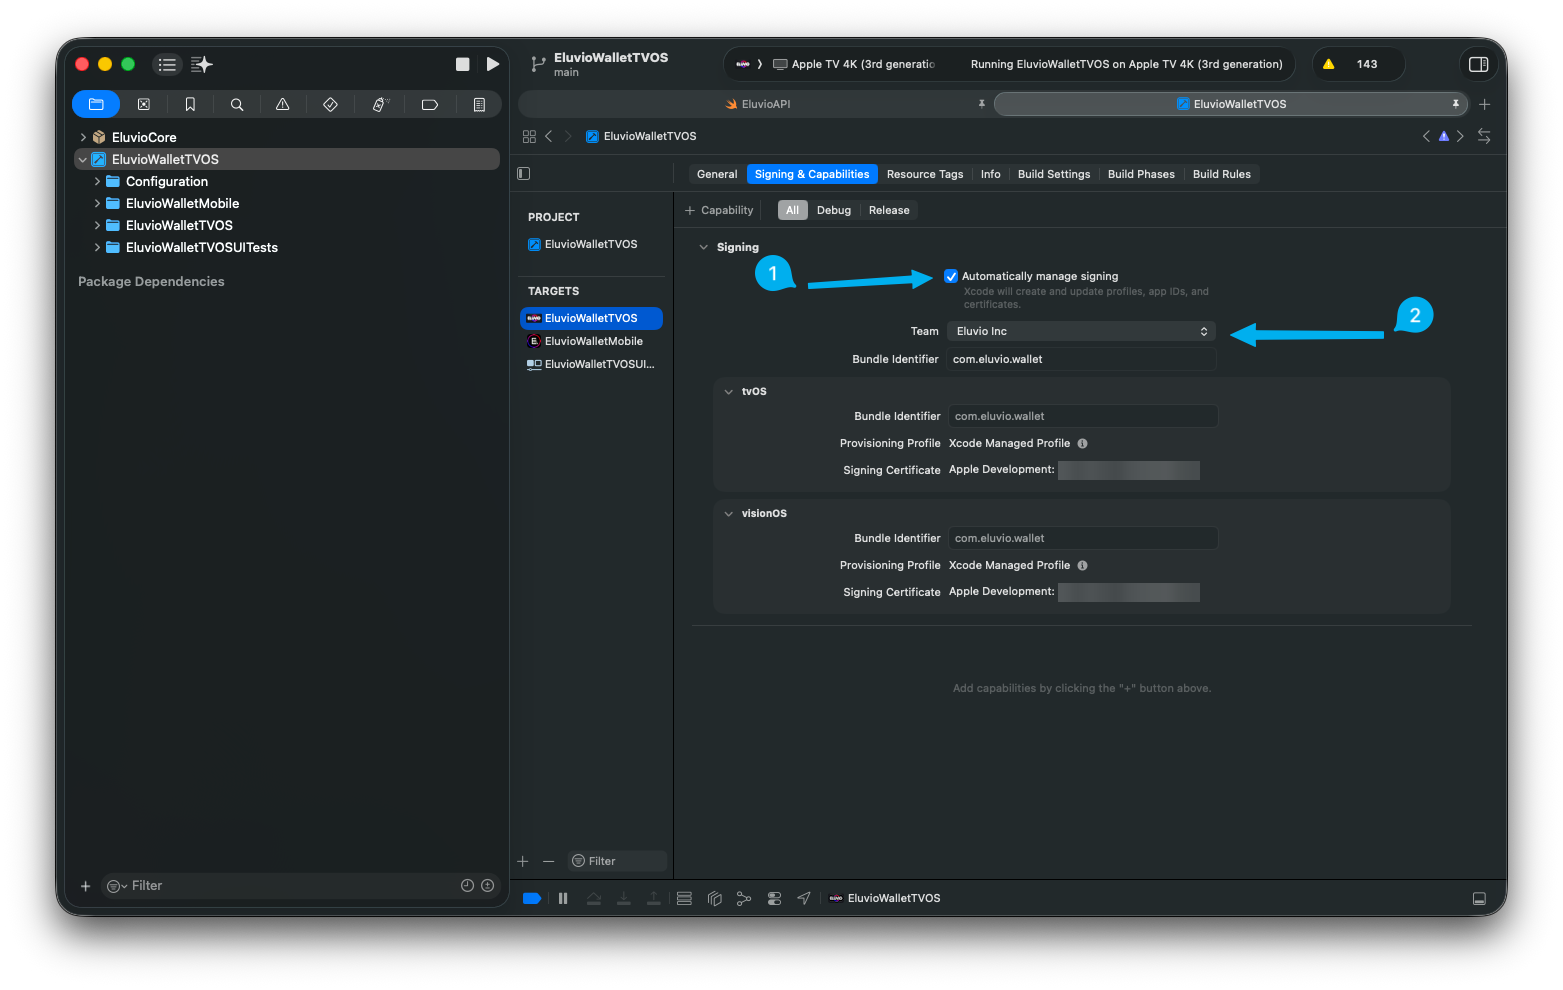
Xcode will now create a development certificate and provisioning profile for your team. When it settles, Signing Certificate reads "Apple Development:" followed by a name and a certificate identifier, with no red error text.
The pane repeats Bundle Identifier, Provisioning Profile, and Signing Certificate once per destination — tvOS and visionOS — because the target is configured for both. That is expected, and the single Team setting covers them both.
Notes on the other targets
The project contains two targets you can usually ignore:
- EluvioWalletTVOSUITests — the UI test target. It only needs a team set if you intend to run the UI tests on a device. It is not part of the archive.
- EluvioWalletMobile — an iOS target, shipped as a demo. It is not part of the tvOS scheme and does not need to be configured or signed for a tvOS App Store release.
If you do configure them, give the test target a bundle ID derived from your own, such as
com.yourcompany.yourappname.uitests.
Version and build numbers
Two separate fields, with different rules:
- Version (
MARKETING_VERSION) — what customers see, e.g.1.0,1.1,2.0. - Build (
CURRENT_PROJECT_VERSION) — internal. Must increase with every single upload to App Store Connect, even a re-upload of the same version after a failure. If you forget, the upload is rejected with "The bundle version must be higher than the previously uploaded version."
A simple convention: keep Version stable during a release cycle and bump Build every
upload — 1.0 (1), 1.0 (2), 1.0 (3).
Verify on a real device
Do not go straight to archiving. Confirm the app builds and runs signed with your team first — device problems are far easier to diagnose than archive problems.
-
Pair your Apple TV with Xcode: Window → Devices and Simulators, then follow Apple's pairing instructions. Both devices must be on the same network.
-
Select your Apple TV in the run destination menu in the toolbar.
-
Press ⌘R.
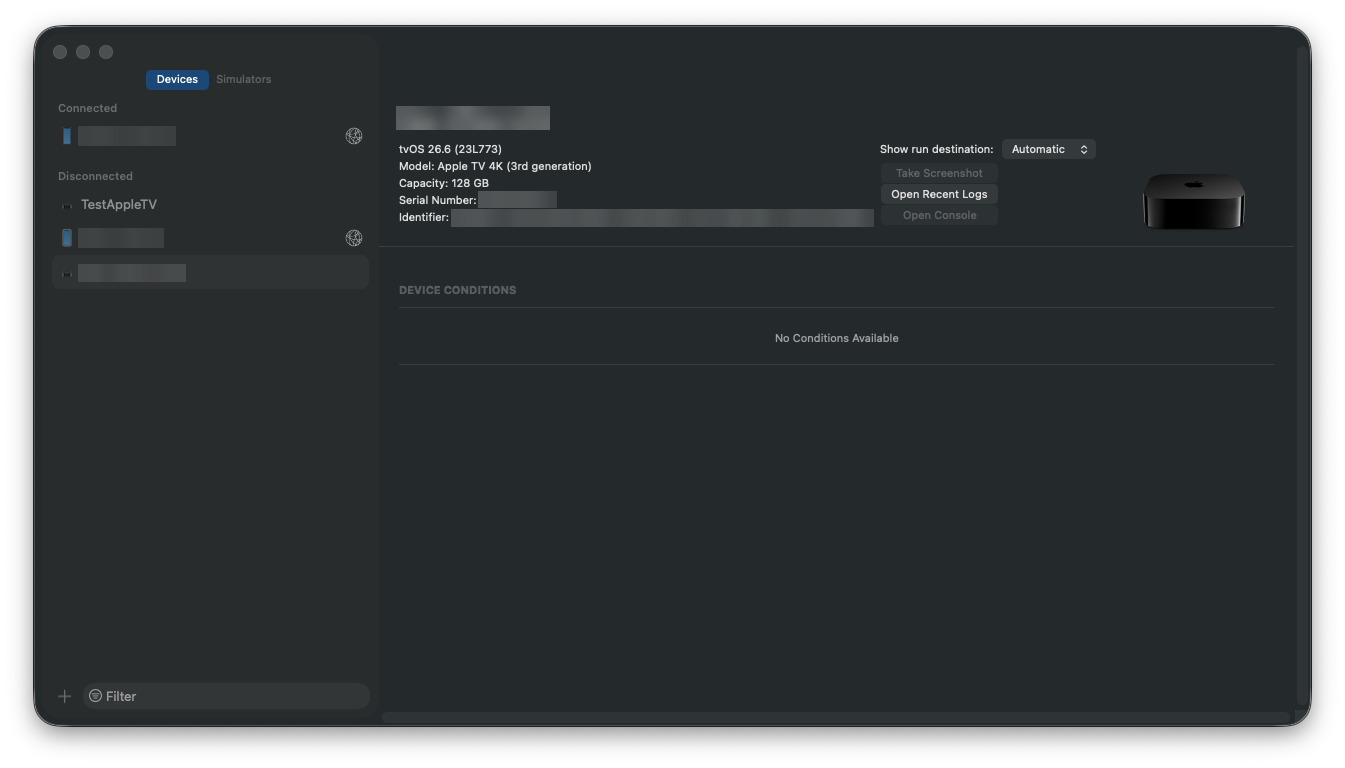
The app should launch on the TV showing your property. Verify DRM playback here — this is the check the simulator cannot do for you.
Next
Signing works, so you can now archive and upload the build.
If signing is not working, see Troubleshooting.